


Handy Tips for Cleaning E-bike Brake Pads
Squeaky brakes are inconvenient while riding an e-bike along the street. A "squeak" happens when your bike's brake pads do not link smoothly to the disc rotors. Most of the time, this is because oil and other pollutants on the rotors (and the extended brake pads) decrease friction and cause the brakes to wear down quicker, resulting in poor braking performance.
Something went wrong with the e-bike disc brakes. Don't be concerned! Cleaning the brake pads and disc rotors will make them last longer, your e-bike will operate smoother, and you may be able to eliminate any bothersome sounds. Cleaning disc brakes only a little amount of brake oil and should take no more than an hour. It's critical to maintain your disc brakes in excellent working condition, so we asked bike maintenance professionals for a list of the best methods to replace pads and disc rotors.
Why are your brakes screeching on your bike?
A screaming noise from your e-bike brakes might indicate a problem. The most typical reason is oil on disc rotors, brake pads, or rims. As a result, I propose that you wash them.
It's possible that your recently fitted brake pads haven't had enough time to settle down and cease screeching. You may freely ride the e-bikes to let them acclimate, but don't go too far until they feel more responsive.
Brake vibration is another concern when they are not properly adjusted. You should take them off and see whether this is the case.
Why do brake pads get filthy?
Most of the time, this is because the brake pads have absorbed grease or oil from a greased gearbox or from driving on muddy roads. Because brake pads are permeable, this oil may soak in and create a film, reducing the efficacy of your brakes significantly.
This kind of dirt is often responsible for irritating sounds. In this scenario, inspect the brake pads to determine whether they still have any braking surfaces accessible and if so, remove them from the caliper.
How to Clean Brake Pads Properly to Stop Squealing?
If your brakes aren't functioning and you're certain the pads aren't worn, they're most likely unclean. I'll teach you how to clean the brake pads to restore complete braking force.
Tools Required for Cleaning bike Brake Pads
T25 screwdriver 2.5mm Allen key disc brake cleaning tissue sandpaper (size may vary depending on your brakes)
Gloves
Cleaning bike brake pads is simple:
Take off the brake pads
Before you do anything else, put on your gloves. Dirt will not harm your brake pads or rotors. Avoid getting oil on your fingertips if you touch the brakes.
To begin, dismantle the rotor. This job requires the use of a T25 screwdriver.
If your rotor has a center lock, you'll need a center lock tool to remove it. Place the rotors on a paper towel to dry after removing them.
The brake pads may now be taken off. Everything is dependent on the sort of brakes you have. But they're all quite similar, so let's get started!
Remove the circlip retainer first
The bolts that hold the washers in place must then be removed. A 2.5mm Allen key may be needed.
The pads may be slipped out when the fasteners are removed. Throughout the operation, keep the cushion stretcher in your hand.
Place the pad on a fresh paper towel after removing it.
Examine and clean the brake pads
Check your brake pads for wear since you may need to replace them rather than merely clean them.
To guarantee safe braking, brake pads should be changed when they have less than 1.5mm of brake material remaining.
However, if they do, you should proceed.
Shengmilo advises you not to brake for the time being. Applying braking pressure when the disc rotor is removed might cause the piston to exceed its limit, resulting in hydraulic system damage. This requires the braking unit to discharge the fluid.
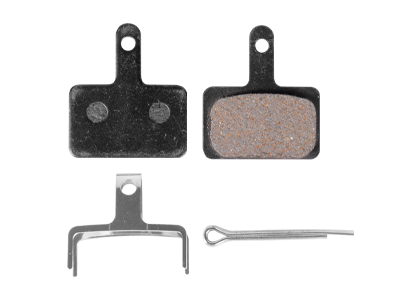
Disc Brake Cleaner is a disc brake rotor and pad cleaner. This picture shows both the front and rear. Then, using a paper towel, clean the braking system of dust and brake pad residue.
Throughout the procedure, each rotor and pad must be wiped with a separate clean paper towel. This cleans the brakes of dirt and dust.
The cleanliness and shine of the pads and discs should be noticeably improved.
Once the rotor has been thoroughly cleaned, consider roughening its surface. This is because it increases friction, which is undesirable. It is in your best interest to maximize the amount of friction since this will improve braking power.
Sand the surface of the brake pads with sandpaper by pushing the sandpaper on the brake pads. After a significant amount of work, the surface will begin to feel abrasive to the touch.
After sanding the disc brake pads, apply extra disc brake cleaner and wipe the pads clean with a paper towel. This is done to remove any dust or debris that has accumulated throughout the sanding procedure.
Take a few extra paper towels and spritz them with brake disc cleaning. With a paper towel, wipe the calipers. Using this procedure enables cleaning up the brake dust that has accumulated simpler. Also, ensure that the hub that holds the rotor is clean.
Replace the brake pads
Now that everything is clean, it's time to start again and reassemble everything.
Don't put off installing the rotor. A torque wrench is required since the bolts must be tightened. A control on the rotor enables you to adjust the torque output. Determine how many bolts need tightening tension changes. remember!
After checking that the caliper extender is there, replace the caliper pads.
After restoring the retainer, tighten the pad-holding screw using an Allen key.
The screech and rubbing of the brakes should now be much reduced, and braking performance should improve. Before departing on a large excursion, I suggest completing a lap around the neighborhood. You could get a feel of the landscape if you do this.
Before leaving on a lengthy vacation, I always do a sensory check, since you don't want to discover something wrong while you're thousands of miles away from home.
Should the brake pads be cleaned or replaced entirely?
However, how lonely you feel isn't always a good predictor of whether you need to repair your brakes, so give them a full inspection regularly. When examining the pads, measure the appropriate thickness of the pad material, which is about 1.5mm. If it is lower, it must be changed.
Any leftover residue may be wiped away, and you can then reap the benefits of cleaning's greater stopping power.
The degree of pad wear may be determined by examining the caliper. It's much simpler to inspect the pad since you can see how far the piston is pushed out.
If you can hear metal scraping against metal, it's time for an upgrade.
If your brakes seem softer than normal, there's another clue that you need a new pad.
Additional Issues
Can I clean my brake pads with alcohol?
Alcohol, according to experts, is one of the most efficient methods to clean brake pads without hurting the rotors.
Oil is a popular element in e-bike brake cleaners, so if you use one, be sure it's meant for bike brakes rather than vehicle brakes.
Can WD40 be sprayed on the brake pads?
Never spray WD40 on brake pads.
A lubricant such as WD40 may be beneficial in reducing wear. Some of your braking system components may be harmed if you use WD40.
Spraying WD40 on your brake pads may temporarily make them quieter, but it may also diminish their efficacy.
We at Shengmilo hope that these suggestions will save you from having to replace your brake pads every time they get filthy.
Leave a comment